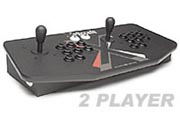
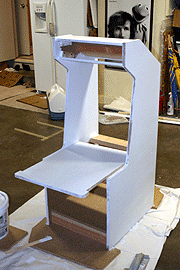
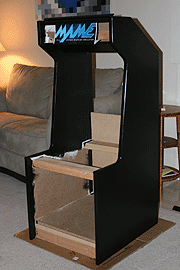
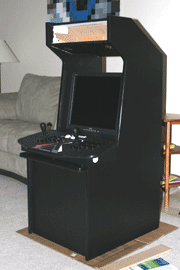
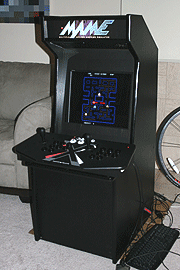
So you ask how did it all start? Like everyone else on the web that has embarked on a project like this, it all started from one situation or event. And here is my story. Yes I grew up in the days when Pong was everywhere, and Space Invaders was a technological advancement. Through high school and college, my pilgramages to the video arcade to escape reality were memorable. As for my current obsession with this project, it was sparked by a comment from my good friend Darwin and his passion for all things electronic and video game related. He always had the coolest games and all the newest consoles when they came out. He's had a full sized upright MAME machine he built from a kit for some time, but that never peaked my interest, untill just recently. He had recently mentioned his upright MAME machine and about X-arcade's recent sale on controllers (8/2006). I said why not! I purchased a dual player joystick controller and a trackball, just to try out. With their 30 day return policy and their lifetime warantee, what could I lose?
After
loading the included game CD into my laptop and playing millipede and
joust (2 Player), I was hooked and decided to proceed with building a
MAME machine.
Then the hard part came, questions about how I would go about embarking on this quest and what my ultimate goal was. To satisfy the wife, I had to make sure I had games installed that would interest her, and also the kids. I was going to mainly build it for myself and use them as the excuse. It also had to look well built, nothing haphazard. Then sketch time I bought a notebook with graph paper and started to jot down ideas. What form factor? logistics of controlers? type of computer?.. etc... Since esthetics was probably of the utmost concern for SAF (spouse approval factor), I had to decide on a form factor. A full sized upright would probably take up too much room and be an eyesore in our small family room. The other option was a cocktail table. The only problem I had with a cocktail table was the limited controller area real estate. I wanted not only two joystick stations for dual play but I also wanted a trackball to play Millipede.A bartop unit required a table. Then after some days of google(ing) and sketching I came upon the miniMAME project. What a novel idea, why didn't I think of that? I was to build a miniturized/little/smaller upright machine that would address all my concerns of size and real estate.
I wanted something that can be versatile and have the ability to be upgraded at a later date, so I came up with some preliminary criteria.
1. Small/baby sized upright
2. integrate X-arcade controllers, be able to swap trackball with joysticks
3. allow future upgrade to custom CP
4. Easily movable
5. Satin black finish
6. T-moulding for authenticity
7. Cool Looking!
Next came the dimensions. Two factors came into play here, the size of the X-arcade controllers and the height of my child's Ikea kids stool. While sitting on one of these stools I wanted to be confortable banging on the keys. This came out to approximately 20" off the floor to the table where the controller would sit (so ultimately 22" off the floor).
Then came width. I wanted to keep the size manageable so I went with an LCD screen instead of a CRT. I also limited my size to (24"x48") what precut particle board was available at my local Home Depot. Some people recommend MDF, but precut MDF was not available at my HD.
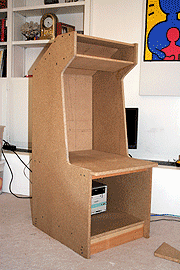
Ultimately,
I came up with dimensions that took my available 18" LCD monitor and
X-arcade controllers into consideration. The cabinet was designed with
a shelf /table top for the controllers to sit on. See pictures to the
left.
Tools: I had most of the necessary hand tools, like a jigsaw, circular saw, drill, carpenter's square. etc. The only thing I didn't have was a router. Luckily my neighbor Raj had one, so all I had to do was search for a slot bit and buy some t-moulding!
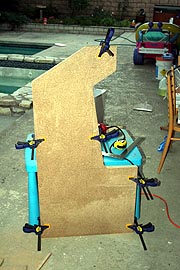
To
save time I decided to cut both sides at once. Boy was that a mistake!
Using a jigsaw with a course blade, I mounted a straight edge to give
me a clean line but I didn't take into account the possibility of the
blade bending, and low and behold the top cut was perfect, but the
bottom cut was skewed, but luckily the cut was on the back and thus a
little modification and recut, and none the wiser! Ultimately for any
longer cuts that required to be straight, the circular saw was used.
(addendum, I finally figured out why this happened, I used a bit that
was not ment to be used with my particular jigsaw, so when installed
the blade was not straight, ugh!)
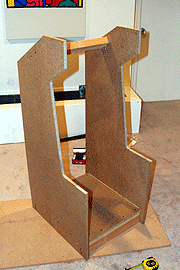
The
parts came into place. One should flush mount all the screws used, by
either quickly driving in the screw, and/or drilling out an inset. The
base was attached to both sides and braces installed. The carcas was
primed with two coats of
primer, and sanded in-between coats. Remember you definately have to
prime and sand particle board! It's rather rough! My slot cutter
finally arrived from Woodline so that was the next step, to cut out
all the slots for the t-moulding. I made the decision not to t-mould
the back or underside.
Before painting I decided to route the slots. using a 1/16, 1/2" slot bit. the corners were a bit tricky but everything turned out fine. I was still awaiting the arrival of my t-moulding from Happs, so I went ahead and painted the unit satin black. I put on about 3 coats of Glidden satin black with a micro roller with even strokes, and after it was dried, it simply looked awesome! Next thing was hammering in the t-moulding. On 90 degree turns or any angle, I cut the spline a bit to allow the moulding to conform to the curves.
Next was to prepare the main
shelf by painting, routing and t-moulding. It fit like a glove and
allowed me the luxury to replace the shelf when I wanted to develop my
own control panel, also cut out a notch in the back to allow cables to be passed through.
Next step was the back door and the kick plate, all cut out of 5/8" particle board. Primed painted and screwed into place. As for the back door, I used a couple of hinges to allow easy access.
Attention
was then directed toward the marquee. I purchased a 13" flourescent
lamp to light it up and printed
a temporary marquee out on a color laser printer and sandwiched between
two pieces of
plexiglass. I attached the plexiglass to the cabinet using marquee
retainers from Happs. After installing
the marquee, I remembered I forot to install the speaker. I took
the marquee area apart, drilled holes in the top cover for speakers and
hot glued in
a small 2.5 inch creative speaker on each side and put everything back
together again.
The finishing touches included a plexiglass bezel with cutout foam board.
I now have a cool babyMAME machine!
- To Do:
1. side art
2. hide all wiring
3. install casters
4. install coin door
5. develop and build my own control panel
Thanks for visiting, Ted
babyMAME@gmail.com
